


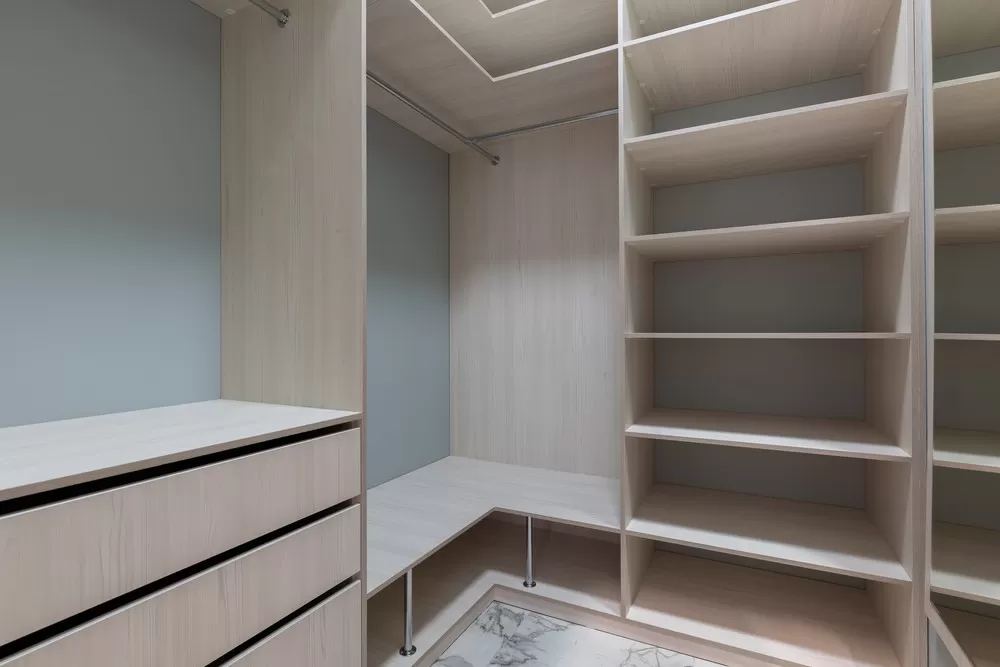
A dream walk-in closet comes from four decisions made in the right order: how much usable wall and floor space you really have, how your wardrobe splits between hanging, folded and shoe storage, which materials and lighting fit your budget, and how easily the system can change later. Measure first, inventory second, choose finishes last.
Most closets that disappoint were designed the other way around. Someone picks a finish they love, orders a standard package of rods and shelves, and then discovers that the coats do not fit, the drawers hit the door trim and the shoes end up on the floor. This guide works through the planning in a practical order, with the dimensions designers commonly use, a layout comparison, a storage worksheet, material trade-offs, lighting advice, cost drivers and the questions worth asking before you sign off on a design.
Start With the Space: Measurements That Matter
A walk-in closet is defined less by square footage than by clearance: the room you need to stand, turn, open a drawer and see what is on a shelf. These working dimensions are widely used by closet designers and give you a quick way to judge what will fit:
- Hanging depth: about 22 to 24 inches so the shoulders of jackets and coats do not rub the back wall or the hanger hooks catch.
- Shelf depth: 12 to 16 inches for folded clothes, shoes and bags. Deeper shelves tend to hide items at the back and collect clutter.
- Walkway: at least 36 inches of clear floor between facing storage, and more if drawers pull into the aisle or you want an island.
- Rod heights: a single rod for long coats and dresses usually sits around 66 to 72 inches off the floor; double-hang rods for shirts and folded trousers sit roughly at 40 and 80 inches.
- Upper storage: anything above comfortable reach works best for luggage, off-season clothes and keepsakes, reachable with a step stool or a pull-down rod.
How to measure without missing anything
Use a tape measure and graph paper, or a free room-planning app, and record each item below before you sketch storage:
- Every wall length, measured at floor level and again at about 5 feet, since older walls are often out of square.
- Ceiling height, plus any bulkheads, soffits or sloped sections.
- The door width and swing direction, including the trim around the opening.
- Windows, heating and cooling vents, outlets, switches and the attic hatch if there is one.
- Baseboard height and thickness, which affect where cabinets and drawer boxes can sit.
Sloped ceilings and awkward corners are common in older homes and attic bedrooms. Rather than treating them as dead space, use them for low shoe shelves, a short drawer stack, or bins for items you rarely touch. A vent in the wrong place does not have to sink the plan either; a designer can usually leave a gap in a cabinet back or move storage a few inches so air still flows.
Choose a Layout That Fits the Room
Once you know the clear dimensions, the shape of the room largely picks the layout for you. This table compares the common options:
| Layout | Typical room width | Works well for | Watch out for |
|---|---|---|---|
| Single wall | Narrow, about 4 to 5 ft | Small bedrooms, condos, one person | Limited room for shoes and drawers |
| Galley (two parallel walls) | About 6 to 7 ft | Couples splitting one side each | Tight aisle if drawers face each other |
| L-shape | Square or corner rooms | Mixed hanging and shelving | Corner needs a carousel or angled shelf to stay useful |
| U-shape | About 7 ft or wider | Large wardrobes, maximum storage | Back wall can feel dark without good lighting |
| U-shape with island | Usually 10 ft or wider | Dressing-room feel, accessory drawers | Needs generous clearance on every side |
Corners deserve special attention. Two runs of hanging rods that meet at a corner create a blind pocket where clothes get crushed. Common fixes are to put shelving on one side of the corner, use a corner shelf unit with a curved or angled front, or install a rotating carousel if you have plenty of hanging items. In a galley closet, try to avoid drawers on both sides directly opposite each other; offset them so two people can use the space at once.
Plan Storage Around What You Actually Own
The single most common design mistake is building a generic mix of rods and shelves and then trying to squeeze your clothes into it. Reverse the process. Before any design meeting, take a quick inventory of everything that will live in the closet.
A simple wardrobe inventory worksheet
- Count hanging items by length. Separate long items (coats, dresses, robes) from short ones (shirts, blazers, skirts, folded trousers). Measure the total linear feet your current rods use, then note how full they are.
- Count shoes and boots. Tall boots need their own height; flats, heels and sneakers can go on flat or angled shelves. As a rough guide, many pairs of adult shoes take 7 to 10 inches of shelf width each.
- List folded items. Sweaters, jeans, T-shirts and workout clothes usually live on shelves or in deep drawers. Heavy knitwear is better folded than hung.
- Note accessories. Watches, jewelry, ties, belts, scarves, handbags and sunglasses all benefit from dedicated inserts rather than loose bins.
- Add 15 to 25 percent growth room. Wardrobes tend to expand, and a closet that is full on day one feels cramped within a year.
Turning the inventory into a plan
With the numbers in hand, allocate wall length section by section. If you have 10 feet of short hanging items, a double-hang section 5 feet wide holds them on two levels and frees wall space for shelves. If you only own a handful of long coats, a full-height section 2 feet wide may be plenty. Shoes go where they are easy to see at a glance, often at eye level or just below, while the items you reach for every morning sit between waist and shoulder height.
That inventory is where custom walk in closets earn their value. Instead of standard modules, a custom layout can put a double-hang section exactly where your shirts are, a long-hang section only as wide as your coats need, and shoe shelving sized to your actual pairs. Small fittings such as pull-out valet rods, velvet-lined jewelry trays, slide-out trouser racks and tilt-out hampers make the everyday routine noticeably faster.
Common storage mistakes to avoid
- Shelves deeper than 16 inches for folded clothes, which leads to hidden piles at the back.
- Drawers placed where they collide with door casings, baseboards or an opposing drawer.
- Rods set at the wrong height for the person who uses them most.
- Too many open shelves for small items, which quickly look messy; drawers or bins hide clutter better.
- No landing spot for tomorrow’s outfit, a bag or items going to the dry cleaner.
Materials and Finishes Compared
Material choice affects cost, durability and how the closet looks after years of daily use. Here is how the main options compare:
| Material | Relative cost | Strengths | Weaknesses |
|---|---|---|---|
| Wire shelving | Lowest | Cheap, quick to install, good airflow | Items tip through gaps, marks knitwear, looks utilitarian |
| Melamine / thermally fused laminate | Moderate | Scratch and moisture resistant, many colors and wood looks | Edges can chip if poorly banded |
| Painted MDF | Moderate to high | Smooth, seamless, easy to match trim | Painted edges can chip in busy areas |
| Wood veneer or solid wood | Highest | Warm, furniture-like look and feel | Cost, sensitivity to humidity and scratches |
Many well-planned closets mix materials: laminate for the carcasses and interior shelves, with veneer or painted fronts on the drawers and the island where you see and touch them most. That approach puts the money where it shows.
Hardware matters as much as panels. Soft-close, full-extension drawer slides, sturdy rod supports for heavy winter coats, and adjustable shelf pins are worth prioritizing if the budget has to stretch. Check shelf spans too: long, thin shelves loaded with sweaters or books can sag over time, so ask whether wider sections use thicker panels or a center support.
Lighting: The Detail Most People Underestimate
A single ceiling fixture casts shadows onto exactly the spots you need to see, especially the lower shelves and the back of a U-shaped closet. Layered lighting fixes that:
- Ambient: recessed lights or a flush-mount fixture for general light across the room.
- Task: LED strips under shelves or integrated into hanging rods light clothes directly so you can tell colors apart.
- Accent: lit display shelves for shoes or handbags add a boutique feel and help you find items quickly.
Choose LEDs with a high color rendering index (CRI 90 or above is a common recommendation) and a neutral color temperature so navy and black look different from each other. Motion or door-activated switches are handy when your arms are full, and LEDs give off little heat, which matters in a small enclosed room full of fabric. Any new hardwired lighting should be installed by a licensed electrician, with a permit where your local code requires one.
Comfort, Style and Personal Touches
Function comes first, but the room should also reflect your taste. Some people love a minimalist look with matching slim hangers and handle-less fronts. Others prefer patterned wallpaper on a feature wall, a soft rug, a bench or upholstered stool for putting on shoes, and a full-length mirror. Glass-front drawers show off accessories while keeping dust out, and a small tray on the island gives keys, watches and earrings a home.
If the closet has a window, UV-filtering film or a light shade helps stop colors fading on items stored nearby. Ventilation matters too. Closets without airflow can trap humidity, which is worth considering in basements or rooms next to a bathroom; a louvered door, a small gap under the door or a vent can make a real difference. If your closet shares a wall with an ensuite that is being redone, coordinate the two projects; our guide to bathroom reconstruction and plumbing essentials covers the moisture and plumbing side.
What a Walk-In Closet Can Cost
Costs vary widely with size, materials, hardware, region and installation, so treat any range as a rough guide and get written quotes. In broad terms, DIY wire or modular kits sit at the low end, a professionally designed laminate system for a standard walk-in sits in the mid-range, and full custom millwork with wood finishes, an island and integrated lighting sits at the top end and can cost several times more than a basic system. The biggest price drivers are:
- The number of drawers and doors, since fronts and slides cost more than open shelving.
- Material and finish, with veneer and paint costing more than laminate.
- Specialty inserts, islands, glass, mirrors and pull-out accessories.
- Electrical work for lighting and switches.
- Wall repair, flooring, drywall or door changes needed before installation.
Ways to save without losing function
- Use open shelving for folded items and spend on drawers only where you need them.
- Choose laminate interiors and upgrade only the visible fronts.
- Keep the layout to straight runs and avoid complex corner units where possible.
- Plan wiring for future lighting now, even if you add the fixtures later.
Working With a Closet Designer
Plenty of people start with their own sketch, and that is a useful step. A professional designer adds value by catching problems that are hard to see on paper: drawers that collide with door casings, shelves that bow under heavy sweaters, or rods placed too high for daily use. Local millwork companies such as alliancemillwork.ca typically measure on site, produce a drawing, and build to the exact dimensions of the room. When comparing providers, ask:
- Do you provide a scaled drawing or 3D rendering before production?
- What panel thickness, edge banding and drawer hardware do you use, and what is the warranty?
- Is installation included, and who handles electrical work and permits?
- Which parts stay adjustable after installation?
- What is the typical lead time from sign-off to install, and what deposit is required?
Bring your inventory notes, photos of the room and a few inspiration images to the first meeting. The clearer your brief, the more accurate the first design and quote will be.
Design for Change
Your wardrobe will not stay the same. A new job, a partner moving in, a growing shoe collection or a switch to working from home all change what you store. Adjustable shelves, removable rods, modular drawer stacks and inserts you can swap let the closet adapt without a rebuild. Leaving one section as flexible open shelving is a simple way to absorb change. The same zoning idea applies elsewhere in the house; our guide on how to clean and organize your home office uses similar principles.
Keeping It Organized After Installation
- Rotate seasonal items twice a year and move off-season clothing to the upper shelves.
- Use matching slim hangers to save rod space and keep lines tidy.
- Keep a donation bin in the closet so items you stop wearing leave quickly.
- Label boxes and bins, or use clear containers for smaller accessories.
- Spend five minutes each week putting things back in their zones before clutter builds up.
Bottom Line on Walk-In Closet Design
Measure carefully, plan storage around an honest inventory of what you own, and spend on the things you touch every day: drawers, hardware and lighting. A walk-in closet built in that order stays organized long after the novelty wears off, and it can adapt as your wardrobe and your life change.
Frequently Asked Questions
What is the minimum size for a walk-in closet?
A common rule of thumb is about 4 to 5 feet wide for storage on one side, and about 6 to 7 feet wide for storage on two facing walls. That allows roughly 2 feet of hanging depth per side plus a usable walkway.
How wide should a walk-in closet aisle be?
Aim for at least 36 inches of clear space between facing storage. Allow more if drawers pull out into the aisle or you plan an island in the middle.
What is the best material for custom closet shelving?
Melamine or thermally fused laminate is the most popular balance of cost and durability. Painted MDF and wood veneer look more premium but cost more and need more care.
Is a custom walk-in closet worth it?
It is usually worth it if your room has an awkward shape, you have a large or specialized wardrobe, or you plan to stay in the home for years. For simple rectangular rooms, a well-chosen modular system can be enough.
What lighting is best for a walk-in closet?
Layered LED lighting works best: ceiling lights for general light plus strips under shelves or in rods. Use high-CRI bulbs so colors look accurate when you pick outfits.
How deep should closet shelves be?
Shelves of about 12 to 16 inches suit folded clothes, shoes and bags. Hanging sections need about 22 to 24 inches of depth so garments clear the back wall.
